


In this chapter, we will discuss how to create a table in Word 2010. A table is a structure of vertical columns and horizontal rows with a cell at every intersection. Each cell can contain text or graphics, and you can format the table in any way you want. Usually, the top row in the table is kept as a table header and can be used to put some informative instruction.
Create a Table
The following steps will help you understand how to create a table in a Word document.
Step 1 − Click the Insert tab followed by the Table button. This will display a simple grid as shown below. When you move your mouse over the grid cells, it makes a table in the table that appears in the document. You can make your table having the desired number of rows and columns.
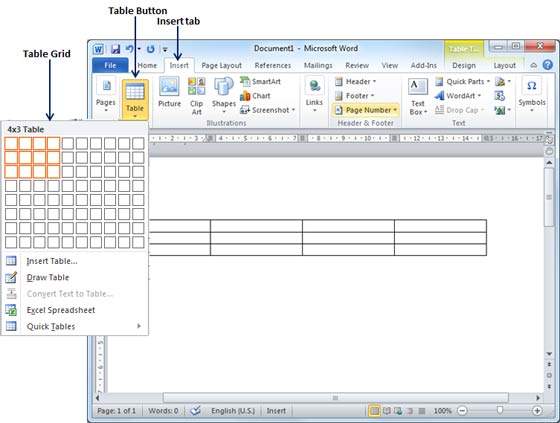
Step 2 − Click the square representing the lower-right corner of your table, which will create an actual table in your document and Word goes in the table design mode. The table design mode has many options to work with as shown below.
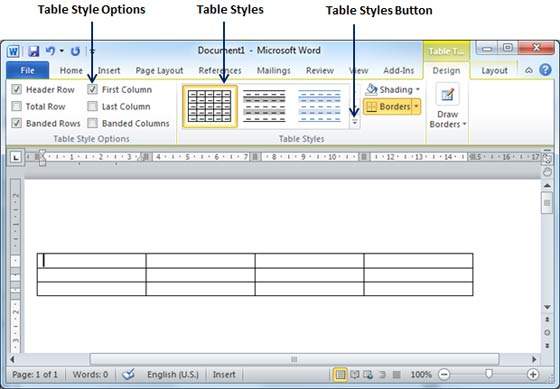
Step 3 − This is an optional step that can be worked out if you want to have a fancy table. Click the Table Styles button to display a gallery of table styles. When you move your mouse over any of the styles, it shows a real-time preview of your actual table.
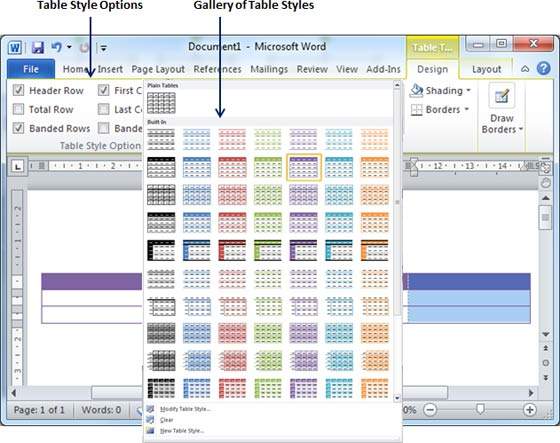
Step 4 − To select any of the styles, just click the built-in table style and you will see that the selected style has been applied on your table.

Delete a Table
The following are the simple steps to delete an existing table from a word document.
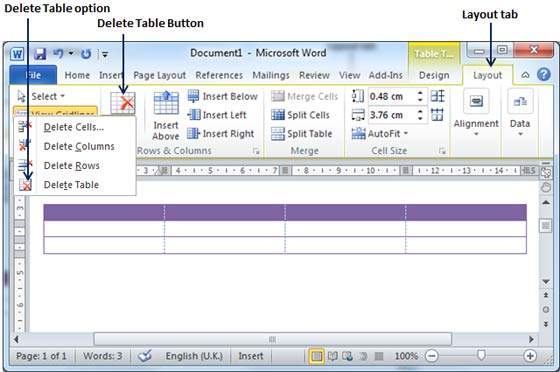
Step 1 − Click anywhere in the table you want to delete.
Step 2 − Click the Layout tab, and click the Delete Table option under the Delete Table Button to delete the complete table from the document along with its content.
Rows & Columns in Word 2010
In this chapter, we will discuss how to work with rows and columns in Word 2010. As discussed in the previous chapter, a table is a structure of vertical columns and horizontal rows with a cell at every intersection. A Word table can contain as many as 63 columns but the number of rows is unlimited. This chapter will teach you how to add and delete rows and columns in a table.
Add a Row
The following are the simple steps to add rows in a table of a word document.
Step 1 − Click a row where you want to add an additional row and then click the Layout tab; it will show the following screen.
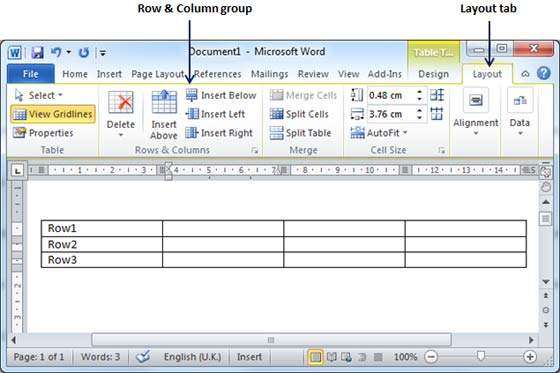
Step 2 − Now use the Row & Column group of buttons to add any row below or above to the selected row. If you click the Insert Below button, it will add a row just below the selected row as follows.
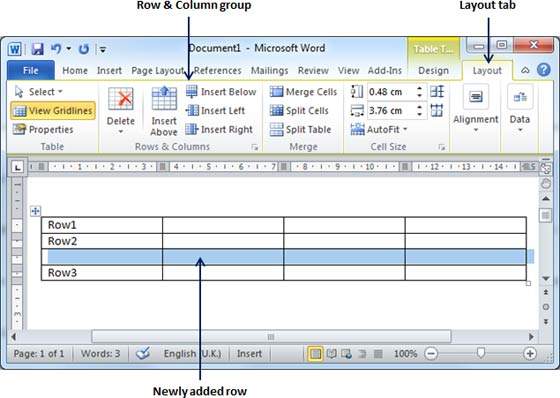
If you click the Insert Above button, it will add a row just above the selected row.
Delete a Row
The following steps will help you delete rows from a table of a Word document.
Step 1 − Click a row that you want to delete from the table and then click the Layout tab; it will show the following screen.
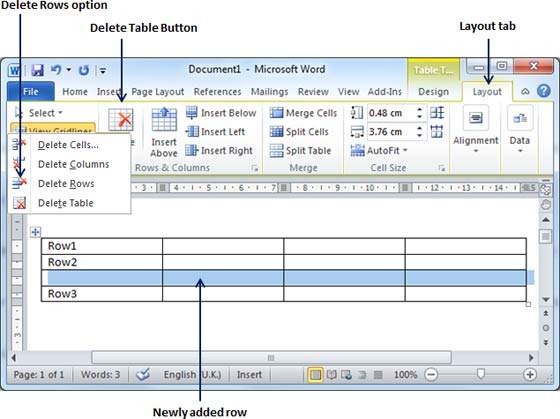
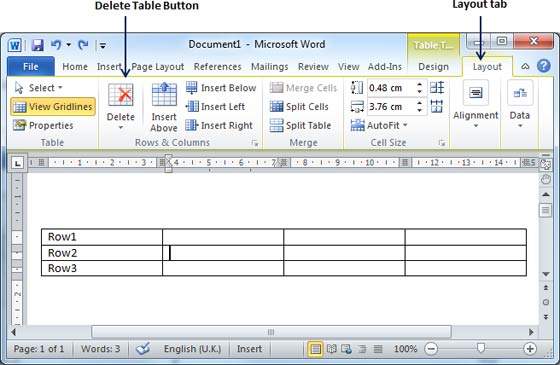
Step 2 − Click the Layout tab, and then click the Delete Rows option under the Delete Table Button to delete the selected row.
Add a Column
The following steps will help you add columns in a table of a Word document.
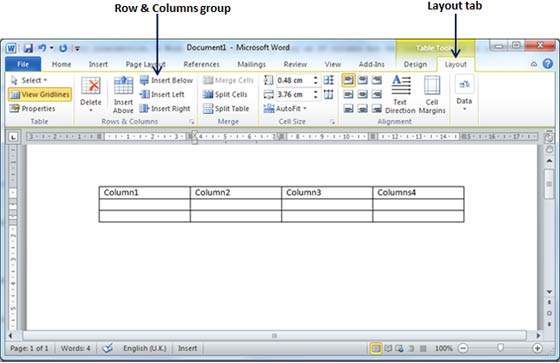
Step 1 − Click a column where you want to add an additional column and then click the Layout tab; it will show the following screen.
Step 2 − Now use the Row & Column group of buttons to add any column to the left or right of the selected column. If you click the Insert Left button, it will add a column just left to the selected column as follows.
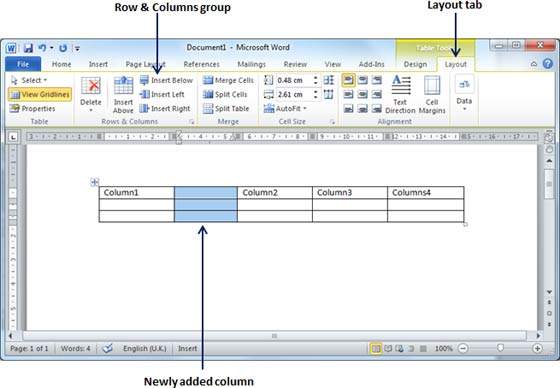
If you click the Insert Right button, it will add a column just next to the selected column.
Delete a Column
The following are the simple steps to delete columns from a table of a word document.
Step 1 − Click a column that you want to delete from the table and then click the Layout tab; it will show the following screen.
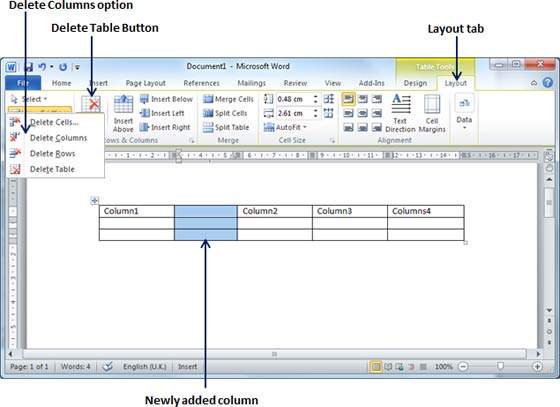
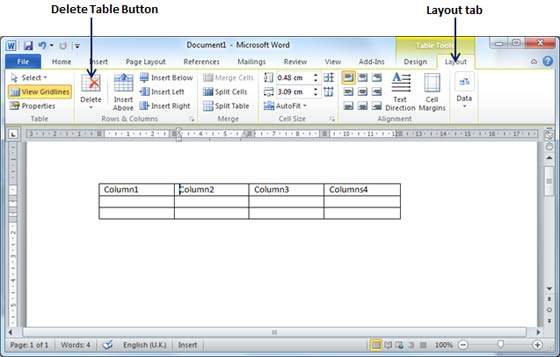
Step 2 − Click the Layout tab, and click the Delete Column option under the Delete Table Button to delete the selected column.
Move a Table in Word 2010
In this chapter, we will discuss how to move a table in Word 2010. Microsoft Word allows moving a table from one location to another location along with its content. This chapter will give you simple steps to move a table within the same document, though you can move a table from one document to another document using the cut and paste operation.
Move a Table
The following steps will help you move a table within the same Word document.
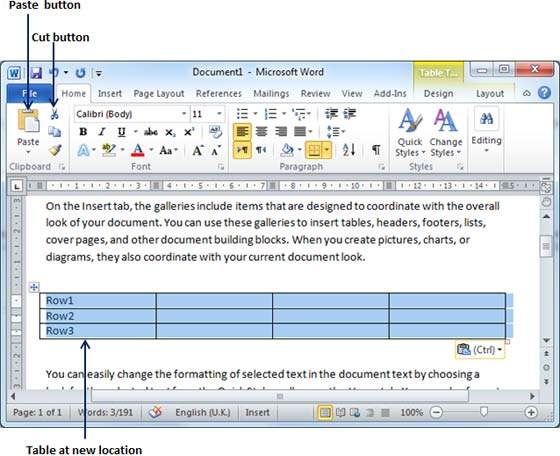
Step 1 − Bring your mouse pointer over the table which you want to move from one location to another location. As soon as you bring your mouse pointer inside the table, a small Cross Icon will appear at the top-left corner of the table as shown below.
Step 2 − Click over the small Cross Icon which will select the whole table. Once the table is selected, use the Cut button or simply press the Ctrl + X keys to cut the table from its original location.
Step 3 − Bring your insertion point at the location where you want to move the table and use the Paste button or simply press Ctrl + V keys to paste the table at the new location.
Resize a Table in Word 2010
In this chapter, we will discuss how to resize a table in Word 2010. Microsoft Word allows resizing a table to make it smaller and bigger as per your requirement.
Resize a Table
The following steps will help you resize a table available in a Word document.
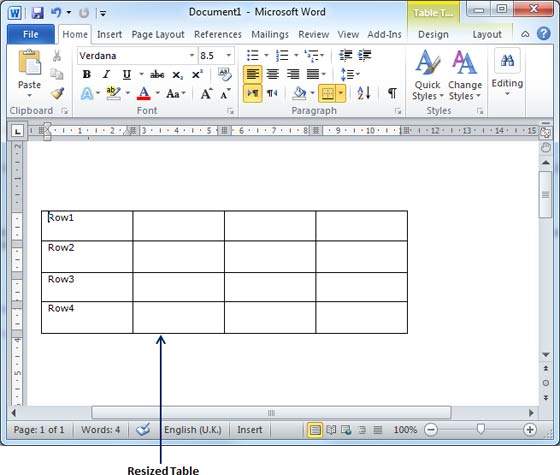
Step 1 − Bring your mouse pointer over the table which you want to resize. As soon as you bring your mouse pointer inside the table, a small Cross Icon will appear at the top-left corner and a small Resize Icon will appear at the bottom-right corner of the table as shown below.
Step 2 − Bring the mouse pointer over the Resize Icon till it changes to a diagonal double-sided arrow and this is the time when you need to press the left mouse button and keep holding the button while resizing the table. Drag the table up to make it shorter or down to make it larger. You can drag the table diagonally to simultaneously change both the width and the height of the table.
Merging Cells in Word 2010
In this chapter, we will discuss how to merge table cells in Word 2010. Microsoft Word allows the merging of two or more cells to create one large cell. You will frequently need to merge columns of the top row to create the title of the table. You can merge cells either row-wise or column-wise, rather you cannot merge cells diagonally. This chapter will teach you how to merge multiple rows or columns.
Merging Cells
The following steps will help you merge table cells in a Word document.
Step 1 − Bring your mouse pointer position inside the first cell that you want to merge. Now press the Shift key and click the cells around the cell which you want to merge into the first cell. This will highlight the cells which you click and they will be ready to be merged.
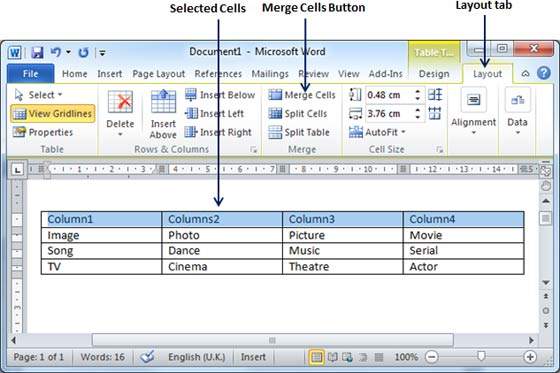
Step 2 − Now click the Layout tab and then click the Merge Cells button which will merge all the selected cells.
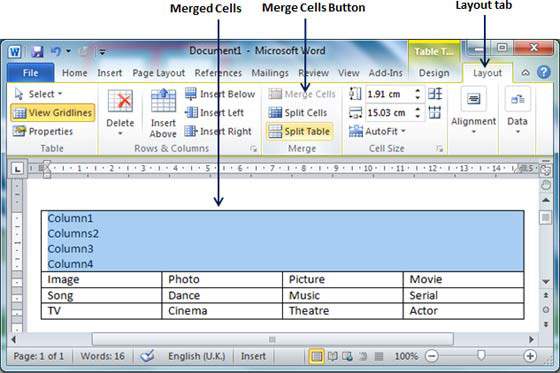
After merging the cells, all the content of the cells will be scrambled which you can fix later as you like. For example, you can convert the merged cell's text into the title or some other description. For example, let us have center-aligned and bigger font text as follows on top of the table.
Split a Table in Word 2010
In this chapter, let us discuss how to split a table in Word 2010. Microsoft Word allows splitting a table into multiple tables but a single operation will always divide a table into two tables. This chapter will teach you how to split a table into two smaller tables.
Split a Table
The following are the simple steps to split a table into two tables in a Word document.
Step 1 − Bring your mouse pointer position anywhere in the row that should appear as the first row of the new table.

Step 2 − Now click the Layout tab and then click the Split Table button which will split the table into two tables and the selected row will become the first row of the lower table.

After splitting the table into two tables, you can further divide it into two parts and you can continue dividing the Word tables as long as a table has more than one row.

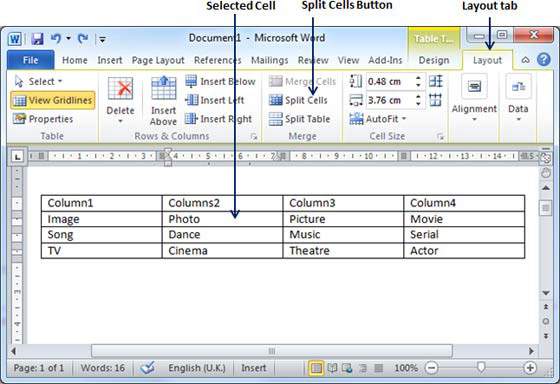
Split Cells in Word 2010
In this chapter, we will discuss how to split table cells in Word 2010. Microsoft Word allows splitting a cell into multiple cells. We will understand how to split a cell into multiple smaller sub-cells.
Split a Cell
The following steps will help you split a cell into two sub-cells of a table available in a word document.
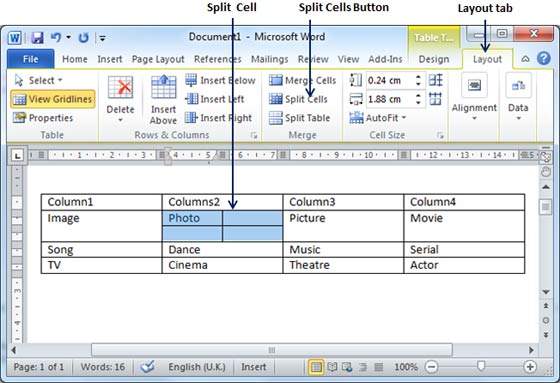
Step 1 − Bring your mouse pointer position inside the cell that has to be divided into multiple cells.
Step 2 − Now click the Layout tab and then click the Split Cells button; this will display a dialog box asking for the number of rows and columns to be created from the selected cell.
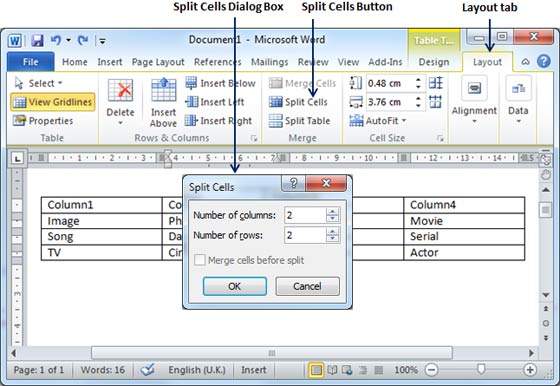
Step 3 − Select the desired number of rows and columns that have to go into the resultant cell and finally click the OK button to apply the result.
You can divide a cell into multiple cells either row-wise or column-wise or both.
Add Formula in Word 2010
In this chapter, we will discuss how to add formula to a table in Word 2010. Microsoft Word allows you to use a mathematical formula in table cells which can be used to add numbers, to find the average of numbers, or find the largest or the smallest number in table cells you specify. There is a list of formulae, you can choose from the many based on the requirement. This chapter will teach you how to use a formula in word tables.
Add a Formula
The following are the simple steps to add formula in a table cell available in Word document.
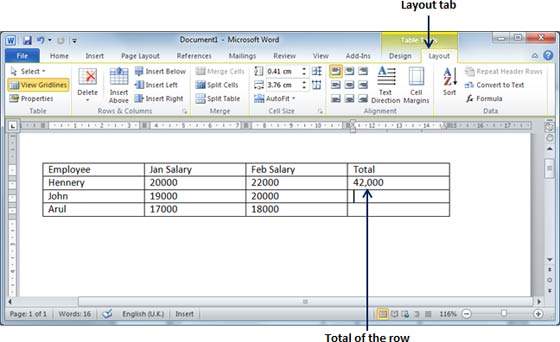
Step 1 − Consider the following table with the total number of rows. Click in a cell that should contain the sum of the rows.
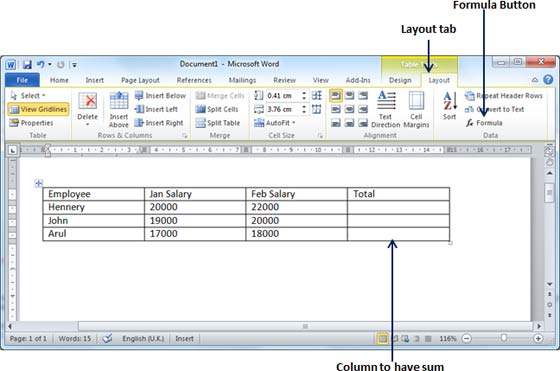
Step 2 − Now click the Layout tab and then click the Formula button; this will display a Formula Dialog Box which will suggest a default formula, which is =SUM(LEFT) in our case. You can select a number format using the Number Format List Box to display the result or you can change the formula using the Formula List Box.
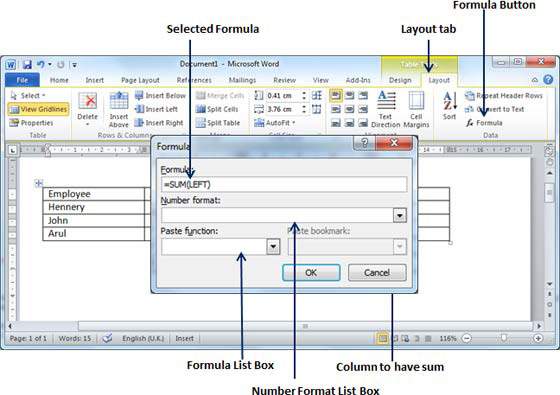
Step 3 − Now click OK to apply the formula and you will see that the left cells have been added and the sum has been put in the total cell where we wanted to have it. You can repeat the procedure to have the sum of the other two rows as well.
Cell Formulae
The Formula dialog box provides the following important functions to be used as a formula in a cell.
| S.No | Formula & Description |
|---|---|
| 1 |
AVERAGE( )
The average of a list of cells
|
| 2 |
COUNT( )
The number of items in a list of cells
|
| 3 |
MAX( )
The largest value in a list of cells
|
| 4 |
MIN( )
The smallest value in a list of cells
|
| 5 |
PRODUCT( )
The multiplication of a list of cells
|
| 6 |
SUM( )
The sum of a list of cells
|
We assume you are familiar with how to create a spreadsheet program; you can construct your word cell formula. Word formulae use a reference system to refer to individual table cells. Each column is identified by a letter, starting with A for the first column, B for the second column, and so on. After the letter comes the row number. Thus, the first cell in the first row is A1, the third cell in the fourth row is C4, and so on.
The following are useful points to help you in constructing a word cell formula.
| S.No | Cell References and Description |
|---|---|
| 1 | A single cell reference, such as B3 or F7 |
| 2 | A range of cells, such as A4: A9 or C5: C13 |
| 3 | A series of individual cells, such as A3, B4, C5 |
| 4 | ABOVE, referring to all cells in the column above the current cell. |
| 5 | BELOW, referring to all cells in the column below the current cell. |
| 6 | LEFT, referring to all cells in the row to the left of the current cell |
| 7 | RIGHT, referring to all cells in the row to the right of the current cell |
You can also construct simple Math expressions, such as B3+B5*10 by using simple mathematical operators +, -, /, *, %.
Borders & Shades in Word 2010
In this chapter, we will discuss how to apply table borders and shades in Word 2010. Microsoft Word allows you to place a border on any or all of the four sides of a table very similar to text, paragraphs, and pages. You can also add shades to table rows and columns. This chapter will teach you how to add borders (left, right, top or bottom) around a table and how to add different shades to various rows and columns of the table.
Add Borders to Table
The following steps will help you add borders in a table cell available in Word document.
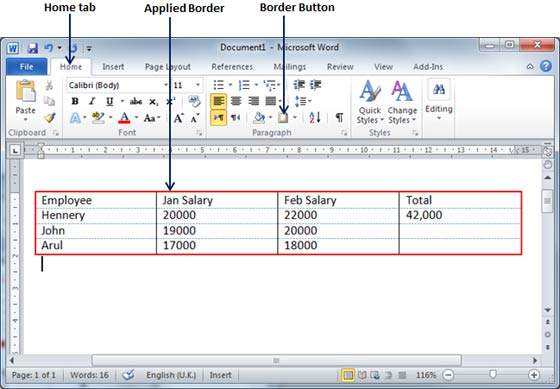
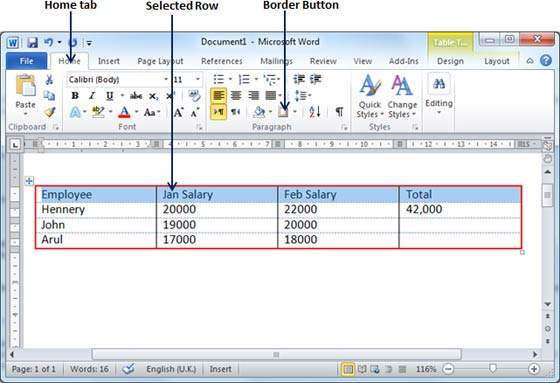
Step 1 − Select the table to which you want to add the border. To select a table, click over the table anywhere which will make the Cross icon visible at the top-left corner of the table. Click this cross icon to select the table.
Step 2 − Click the Border button to display a list of options to put a border around the selected table. You can select any of the options available by simply clicking over it.
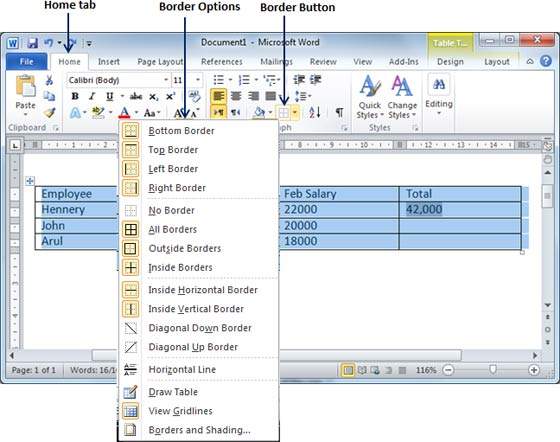
Step 3 − Try to add and remove different borders like left, right, top, or bottom by selecting different options from the border options.

Step 4 − You can apply a border to any of the selected rows or columns. You can try it yourself.
Step 5 − To delete the existing border, simply select the No Border option from the border options.
Using Border Options
You can add borders of your choice to the word table by following the simple steps given below.
Step 1 − Click the Border button to display a list of options to put a border. Select the Border and Shading option available at the bottom of the list of options as shown in the above screenshot. This will display a Border and Shading dialog box. This dialog box can be used to set borders and shading around a selected table.

Step 2 − Click the Border tab; this will display a list of border settings, styles, and options whether this border should be applied to the table or text or paragraph.
Step 3 − You can use the Preview section to disable or enable left, right, top or bottom borders of the selected table or row or column. Follow the given instructions in the preview section itself to design the border you like.
Step 4 − You can customize your border by setting its color, width by using different width thickness available under the style section.
Add Shades To Table
The following steps will help you add shades on a selected table or its rows or columns.
Step 1 − Select a row or column where you want to apply a shade of your choice.
Step 2 − Click the Border button to display a list of options to put a border. Select the Border and Shading option available at the bottom of the list of options. This will display a Border and Shading dialog box. This dialog box can be used to set borders and shading around selected row(s) or column(s).
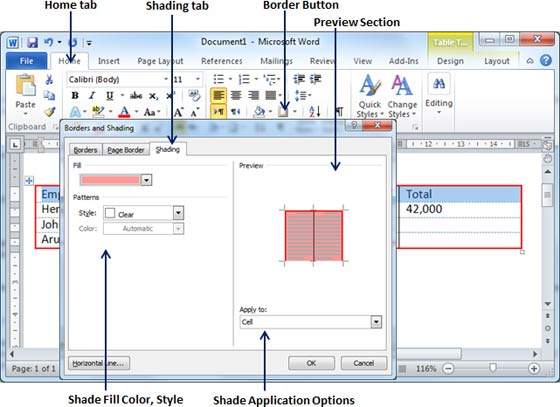
Step 2 − Click the Shading tab which will display options to select fill, color, and style and whether this border should be applied to cell or table or selected portion of text.
Step 3 − You can use the Preview section to have an idea about the expected result. Once you are done, click the OK button to apply the result.


0 Comments